Why the IP 192.168.0.1 is so important, and what can you achieve by accessing it

The IP 192.168.0.1 is a default address that allows you to access the router configuration to modify credentials, create new networks or update firmware
License plates are not exclusive to vehicles. In the digital world, a very similar system facilitates the recognition of computing devices: IP addresses. Addresses can be public, such as the identifiers used to connect to the Internet, or private, such as the identifiers used to connect to a local network, i.e., your home or office network. The IP 192.168.0.1 falls into the latter category.
In the 1990s, when the initial standards and ranges for public and private networks were defined (as in RFC 1918), three ranges were reserved for the latter. Class A, which ranges from 10.0.0.0.0 to 10.255.255.255, is aimed at large networks, such as those of multinational companies. Class B, which ranges from 172.16.0.0.0 to 172.31.255.255, is aimed at medium-sized networks, such as those of universities. Finally, the third range, class C, from 192.168.0.0.0 to 192.168.255.255, is used by smaller private networks.
This means that when setting up a local network, the IP addresses belonging to this C range must be used, the first of which is IP 192.168.0.1. This IP has become the default address in most routers and access points to simplify access and configuration. Therefore, your local network’s IP address is most likely 192.168.0.X, with X being a randomly assigned number.
What is the IP 192.168.0.1 used for?
When you type the IP 192.168.0.1 in a browser, you access the router’s configuration interface. It is essential to have a username and password to log in. The operators usually indicate them in the user manuals and on a sticker placed on the router or access point.
When you log in, you can find all kinds of information about the WiFi network. You can also change the names and passwords or the operator settings to make adjustments, and new networks can be created. For example, a guest network can be created to which visitors can connect, thus avoiding having to give them the WiFi network credentials. This can even be a way to find out who is connected to the network.
The possibilities do not end there. It is advisable to dig into the configuration options to check whether the firmware version is up to date or, on the contrary, a newer one can be installed. Usually, operators perform this task automatically, but it could be delayed for any reason. And nowadays, it is crucial to keep electronic devices up to date.
After all, new versions not only fix usability problems or add new features. They also often include security updates that fix bugs or errors and prevent intruders from entering.
How to prevent unauthorized access to IP 192.168.0.1
There is a fundamental requirement for connecting to the router via IP 192.168.0.1: you must be connected to the network via WiFi or an RJ-45 Ethernet cable. This means that if intruders find a network socket to connect to, gain access to the WiFi or get hold of a device previously connected to the network, they would have free access to the router’s administration interface.
They would still need to know the panel’s access codes. However, this data is often generic. In fact, they are compiled on several pages. If the model is known (and this is not difficult to find out since the login pages often mention the version), these default credentials could open the door for them. On the other hand, if they can get close to the router, it would be enough for them to check the sticker to locate the username and password.
For these reasons, it is vitally important to keep the router out of the reach of third parties and, above all, to change the passwords in the administration panel. Many people continue using the default passwords, either out of ignorance or for convenience, without being aware that this is a considerable security breach.
Also, if it is not necessary to access IP 192.168.0.1 from the WiFi network or from the wired network, the computers usually have a simple firewall that limits access to certain IPs, thus reinforcing protection.
How to fix the most common 192.168.0.1 IP-related bugs
As we have seen above, private network IPs start with 192.168.X.X. However, these Xs do not have to be 0 and 1. You can actually use any number between 0 and 255. So, how do you check which IP is configured?
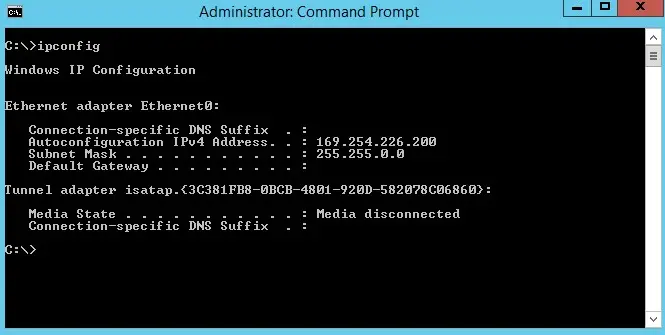
Just type the ipconfig command in the Windows console and then look for the “Default Gateway” field. The router’s IP is displayed there; you can check if it has been changed.

Remember that IP addresses are made up of four numbers separated by dots. While it may seem an absurd error, depending on the type of font, the zeros could be mistaken for an uppercase O, and the ones for a lowercase l. For this reason, when typing the IP you should pay special attention and make sure that only numbers and dots are used and not try to access 192.168.0.l which would be incorrect.
The ipconfig command is also very useful for detecting other problems. For example, if the IP starts with 169.254.X.X instead of 192.168.X.X, it is a sign that something is wrong.

When a device connects to a network, the router automatically decides its IP address. A process known as IP address assignment by DHCP (Dynamic Host Configuration Protocol). In this way, it has a list of the connected devices and the IPs already in use to give it a free one that belongs to the same network range. In this case, 192.168.0.X.
If the device cannot be found, either because it is switched off or disconnected or because it is simply not detected on the network, the computer proceeds to assign an IP address from another range, this time using the APIPA protocol (Automatic Private Internet Protocol Addressing). This protocol assigns an IP address between 169.254.0.1 and 169.254.255.254 and comes into operation when the DHCP server cannot decide the valid IPs due to this connection problem.
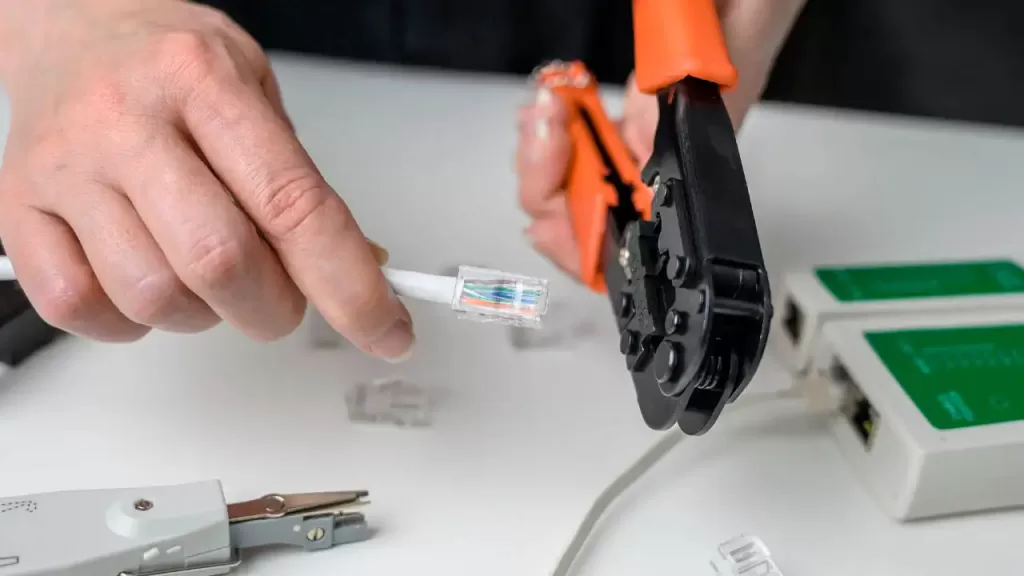
So, how can you resolve this issue? It depends on whether you’re using a cable or WiFi for your connection. If it’s a cable, start by checking if your router is on and the cable is securely connected at both ends. Ensure the cable is undamaged and properly crimped. You can use different tools to test the cable’s condition or its crimping. If you’re unsure, it’s best to replace the cable.

If, on the other hand, the connection is made via WiFi, the problem could be due to a malfunction of the DHCP server. If the situation persists after restarting the WiFi, it could be that the DHCP is disabled. You will then have to manually configure an IP address on the computer to connect to the Internet successfully.
Knowing how IP 192.168.0.1 works is essential for maximizing the network’s functionalities, improve the performance of our WiFi and solving possible errors.