How to create WiFi coverage maps
Table of Contents
Heatmap generation steps:
Looking for powerful wifi heatmap software? After having learned how to create a Wi-Fi site survey project using Acrylic Wi-Fi Heatmaps, and how to calibrate a map for a site survey analysis.
In this tutorial we will go over the process of generating a wifi heatmap, also known as Wi-Fi coverage map.
The first step for generating a Wi-Fi heatmap for a Wi-Fi coverage analysis for which measurements have been performed is the following:
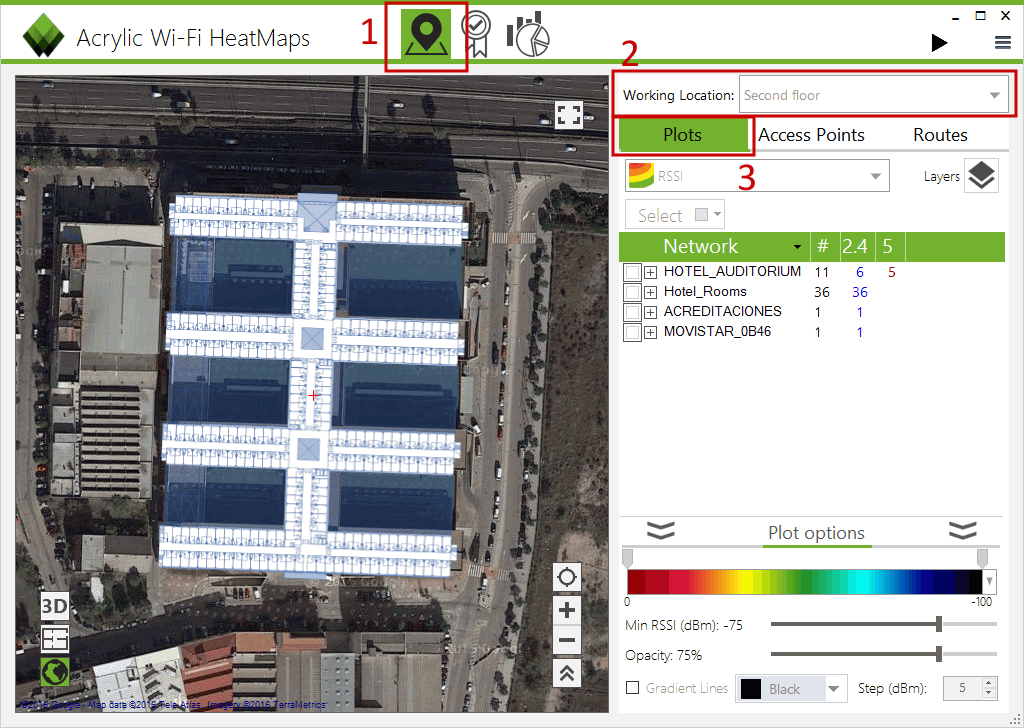
- 1- Go to “Survey” section on the left side menu.
- 2- Select the location for which you are generating the heatmap on the upper bar selector. In our example, it will be “Second floor”.
- 3- Select the “Plot Results” tab.
- Optionally, you can select the Satellite or Blueprint view.
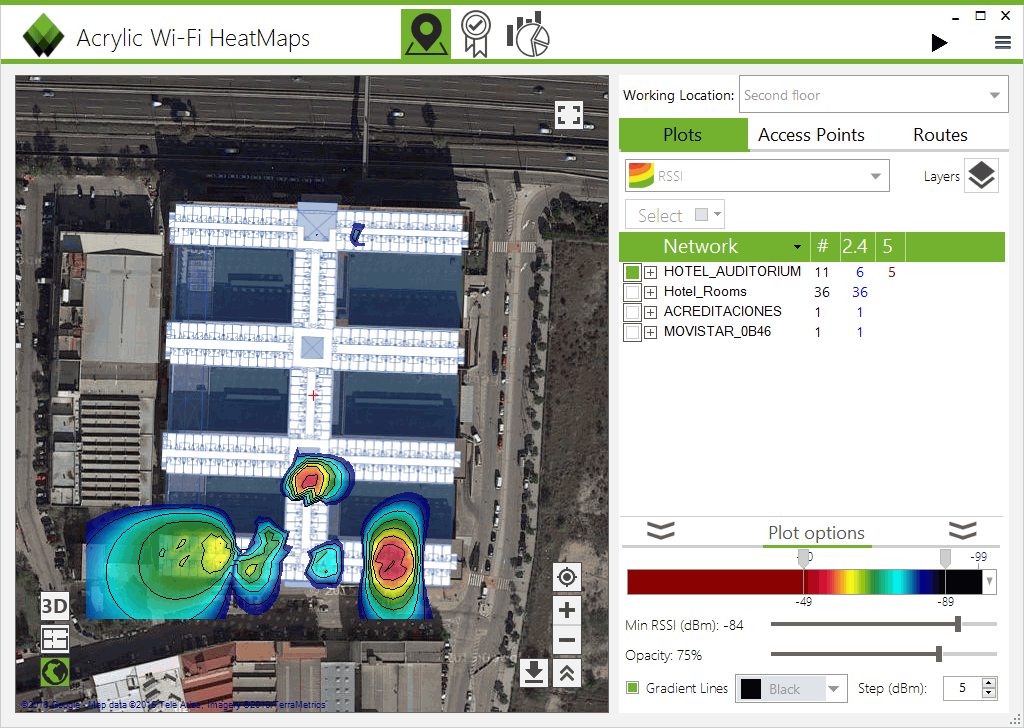
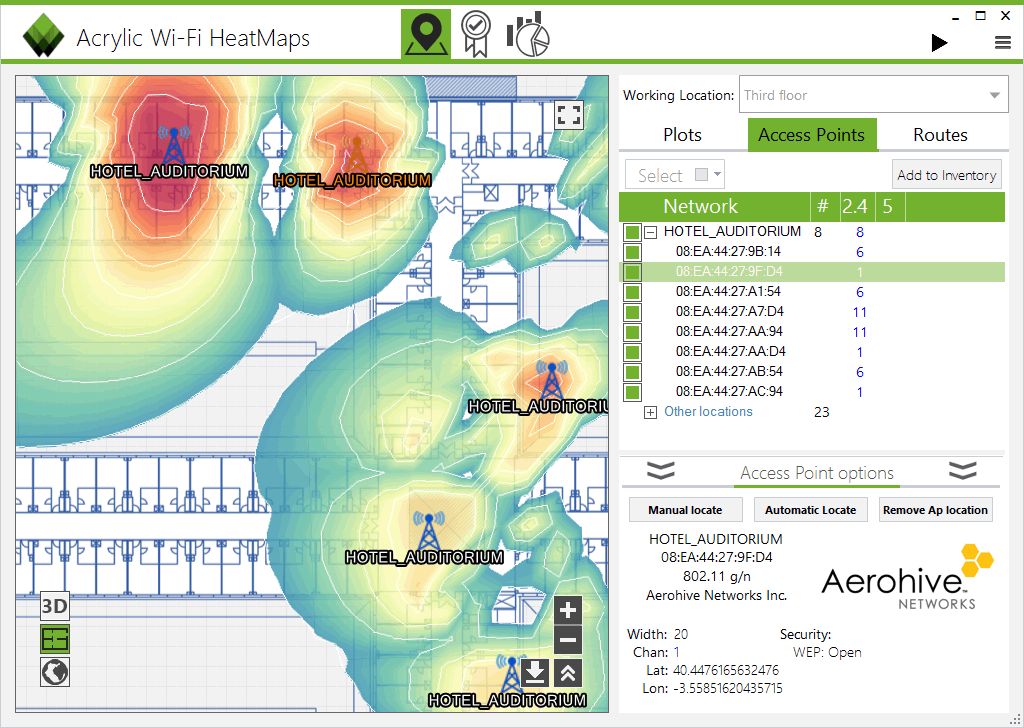
From this window, you can select a network name, a specific access point, or multiple access points.
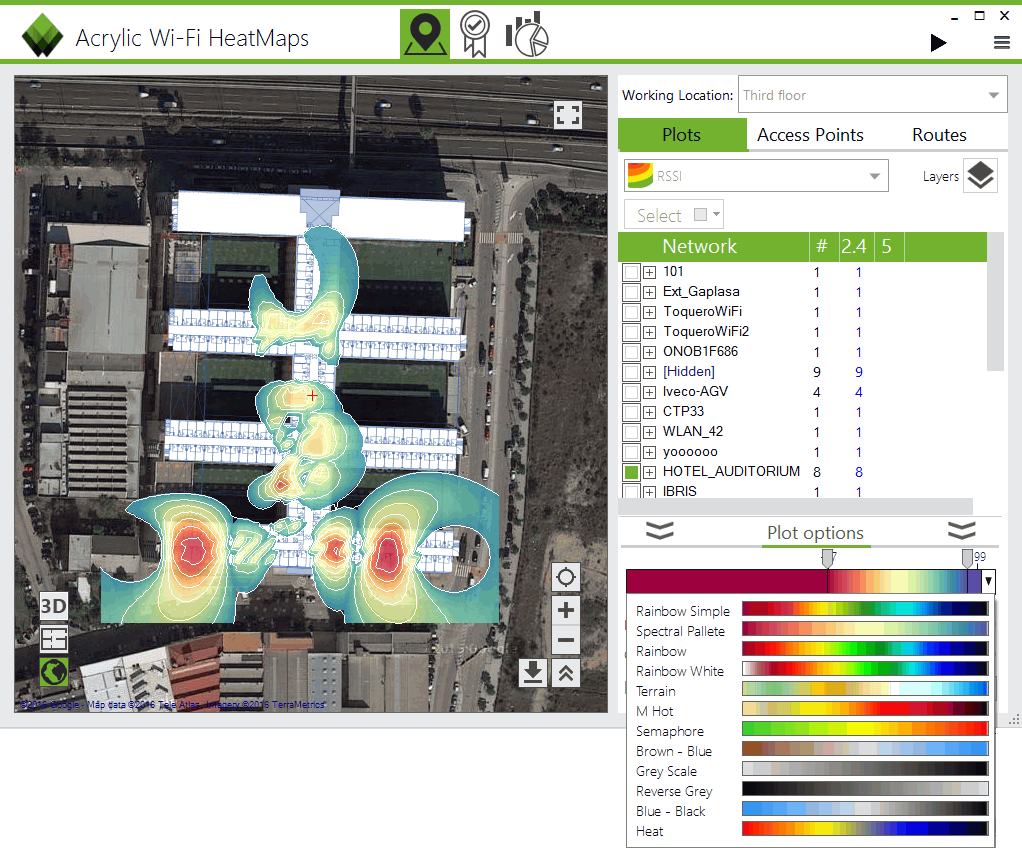
After your selection, a Wi-Fi heatmap will be automatically generated, showing the access points coverage ranges within the surveyed area.
If the selector on the bottom left area “Gradient lines” is enabled, the Wi-Fi signal strength curves associated with the heatmap will also be displayed.
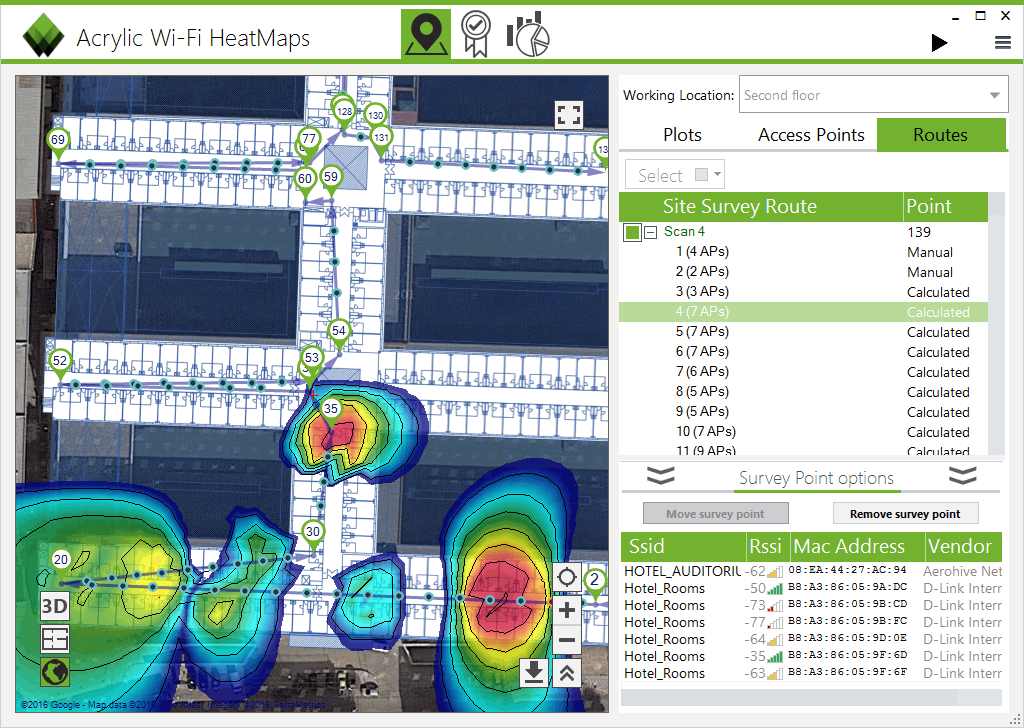
The Wi-Fi survey tab collects the information from all the access points for which measurements have been performed.
In this section, it is also possible to select the measurement points and the Wi-Fi network access points locations.
This process can be applied to all the existing networks within each one of the surveyed locations, for example, the hotel “First floor”.
Each one of the icons on the “Plot results” tab generates a Wi-Fi heatmap with different attributes, such as Signal-to-Noise Rate (SNR), access point overlapping, or coverage distribution by Wi-Fi channel .
Configuring the heatmap
The wifi heatmap color scheme, and the value range scale to display can be change at any time.
All WiFi heat maps can be exported as an image or geolocalized KMZ file.
Wifi Heatmap Rendering
The Wi-Fi heatmap generation mode used until now has been the “normal” mode, where only one Wi-Fi access point or network can be selected while displaying one map at the same time.
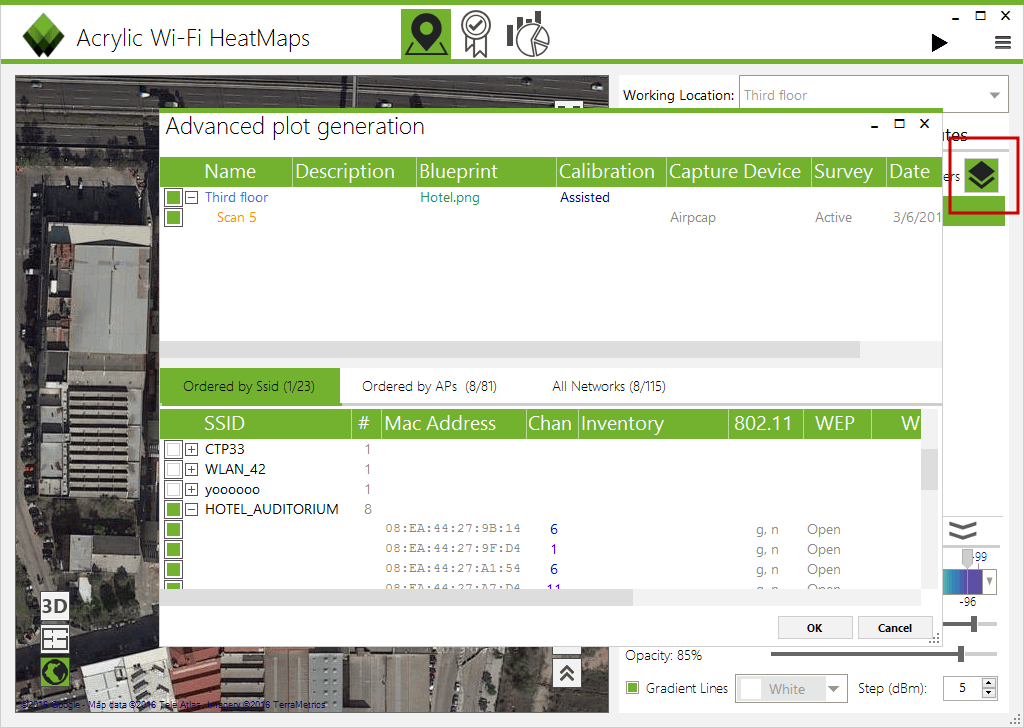
For more flexibility, you can switch to the advanced mode. By clicking on the map selector on the advanced menu, you will be able to select the type of wifi heatmap to generate (Wi-Fi heatmap with RSSI signal strength levels, Signal-to-Noise Rate (SNR) map, AP coverage map, etc.).
In this new window, you can select the number of scans that will be applied and which networks or access points will be included.
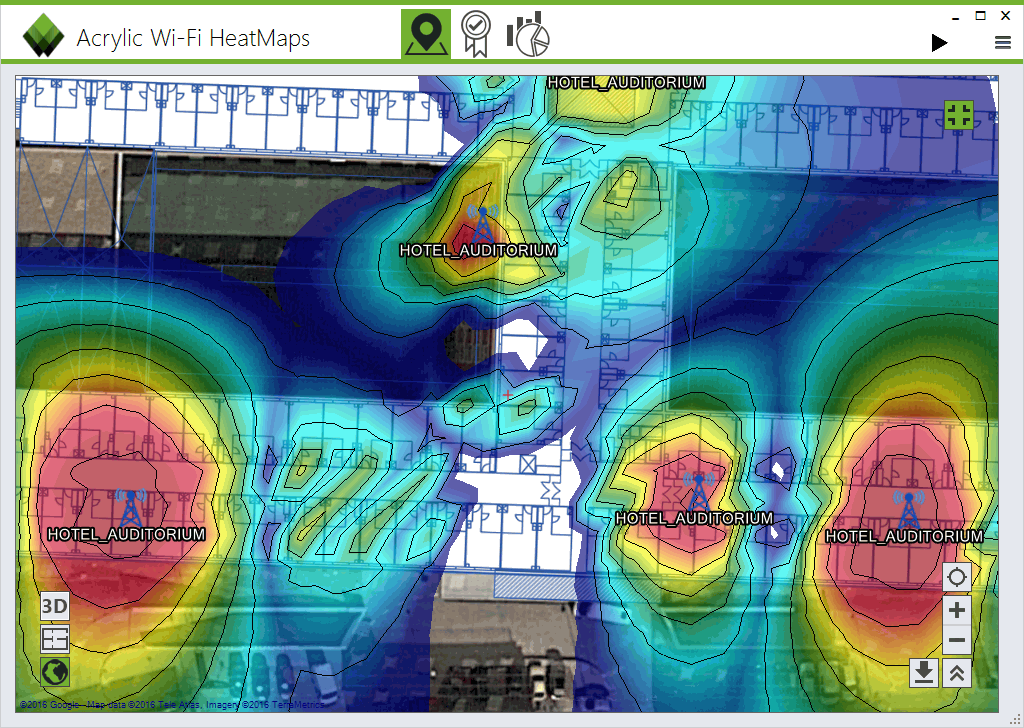
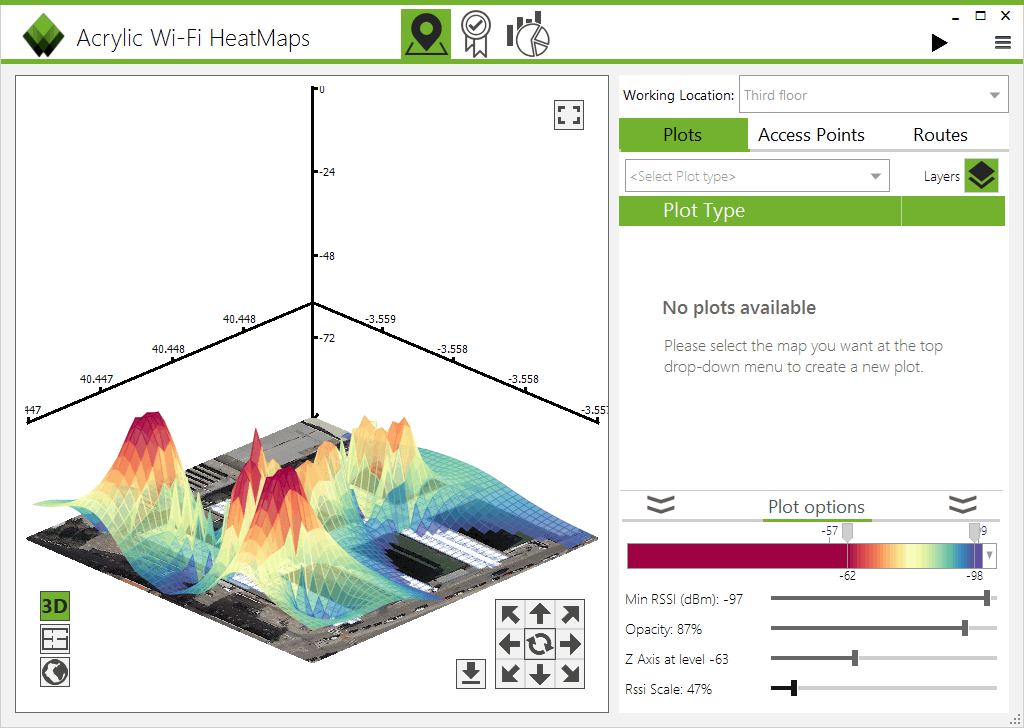
When selecting the “View 3D” button, the Wi-Fi heatmap for the selected network will be displayed in 3D.
The controls on this windows allows you to rotate the Wi-Fi heatmap and select attributes such as color range or signal sensibility.
Conclusions
Acrylic Wi-Fi Heatmaps version 4.5 simplifies the wifi heatmap generation process, while offering the same powerful features. Download the free trial version of this Wi-Fi site survey software.
You may also be interested on the following software tutorials:
- How to Create a Wi-Fi Site Survey Project
- How to Calibrate a Map for a Site Survey Analysis
- How to Create a WiFi Heatmap
- Wi-Fi Coverage Report (Site Survey)
- 3D Coverage Maps
WiFi Heatmap – How to easily create high quality, detailed WiFi coverage maps
